[ 유니티 프로젝트] 대화창 팝업 구조 잡기 및 데이터 연동
이번에 팀원이 구현한 대화창 팝업의 전역적인 사용을 위해 구조를 편집하며 데이터를 연동하였다.
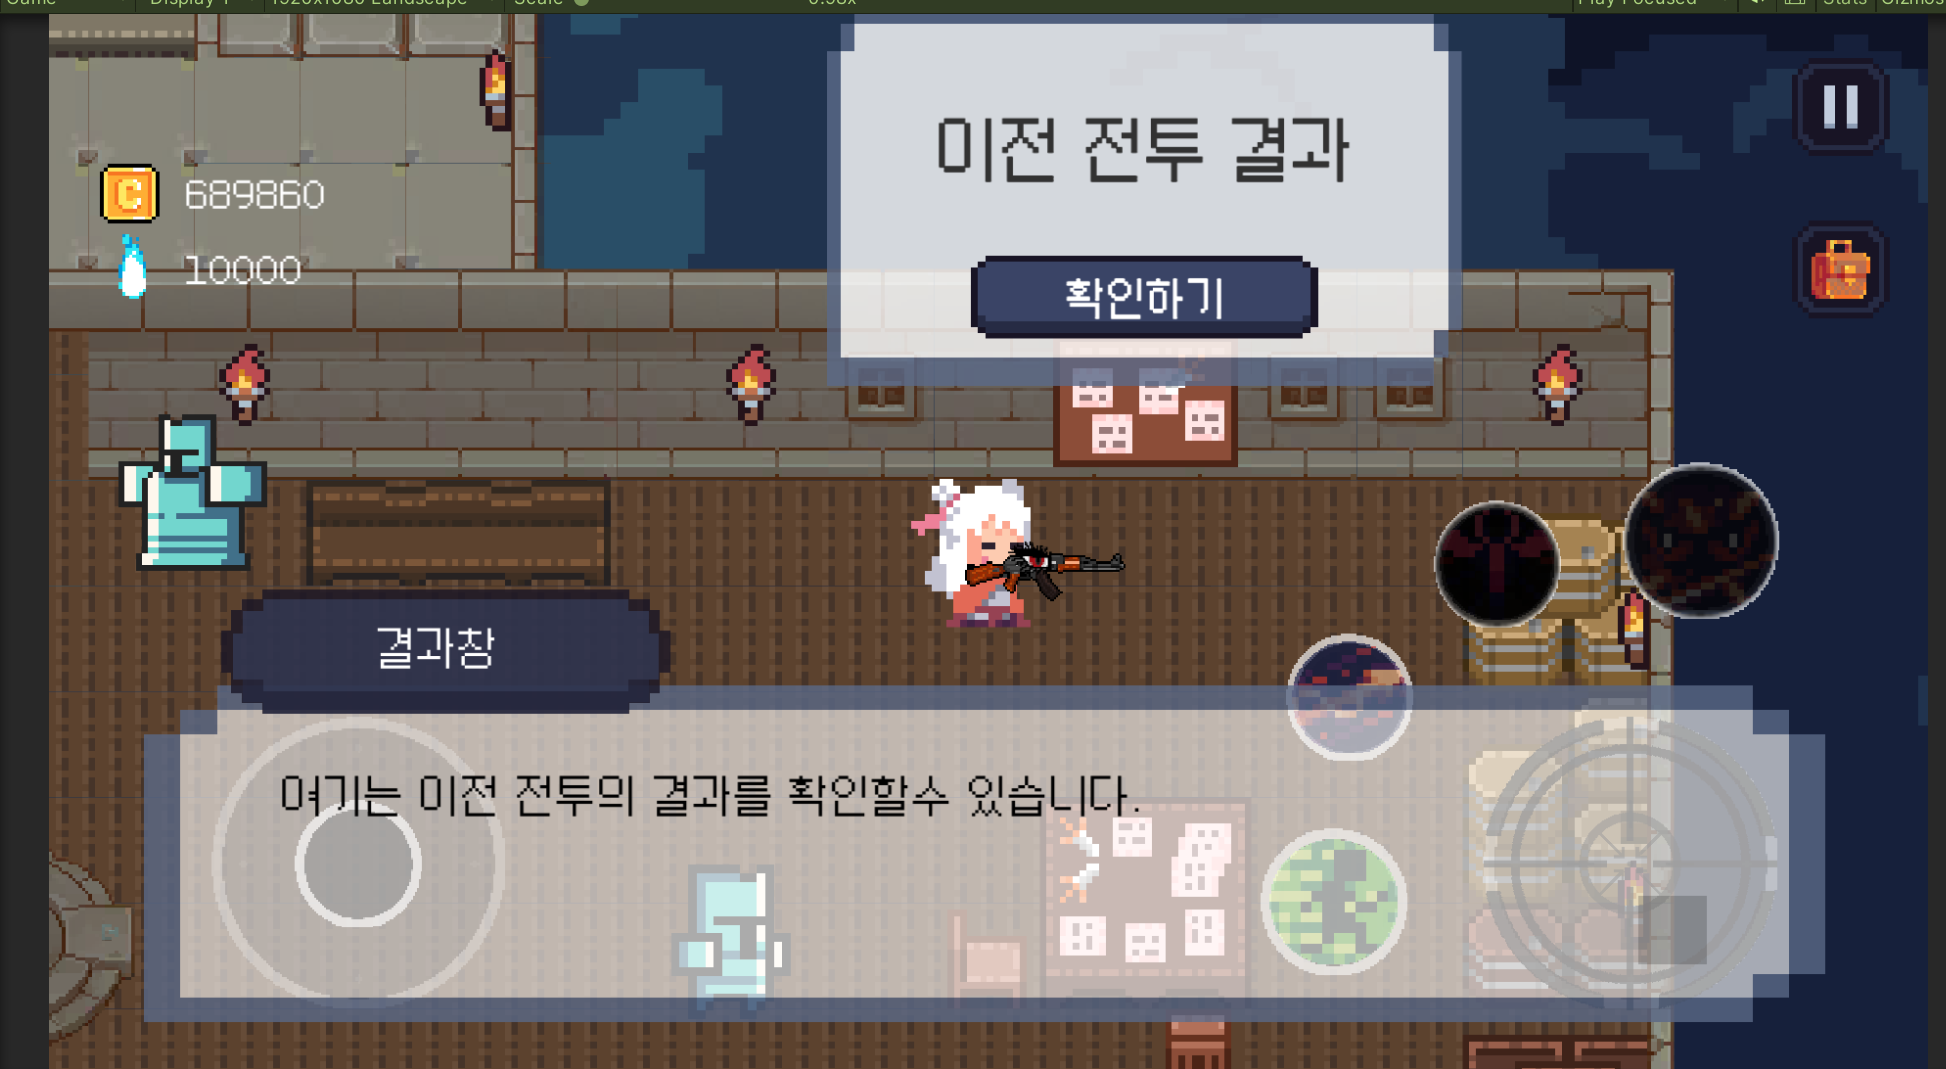
우선 대화창이란 유저와 NPC와의 스토리를 진행시키기 위한 UI, 또는 튜토리얼을 위한 팝업 UI 로 현재 제작중인 건즈 앤 레이첼스에서 사용되는 UI 이다.
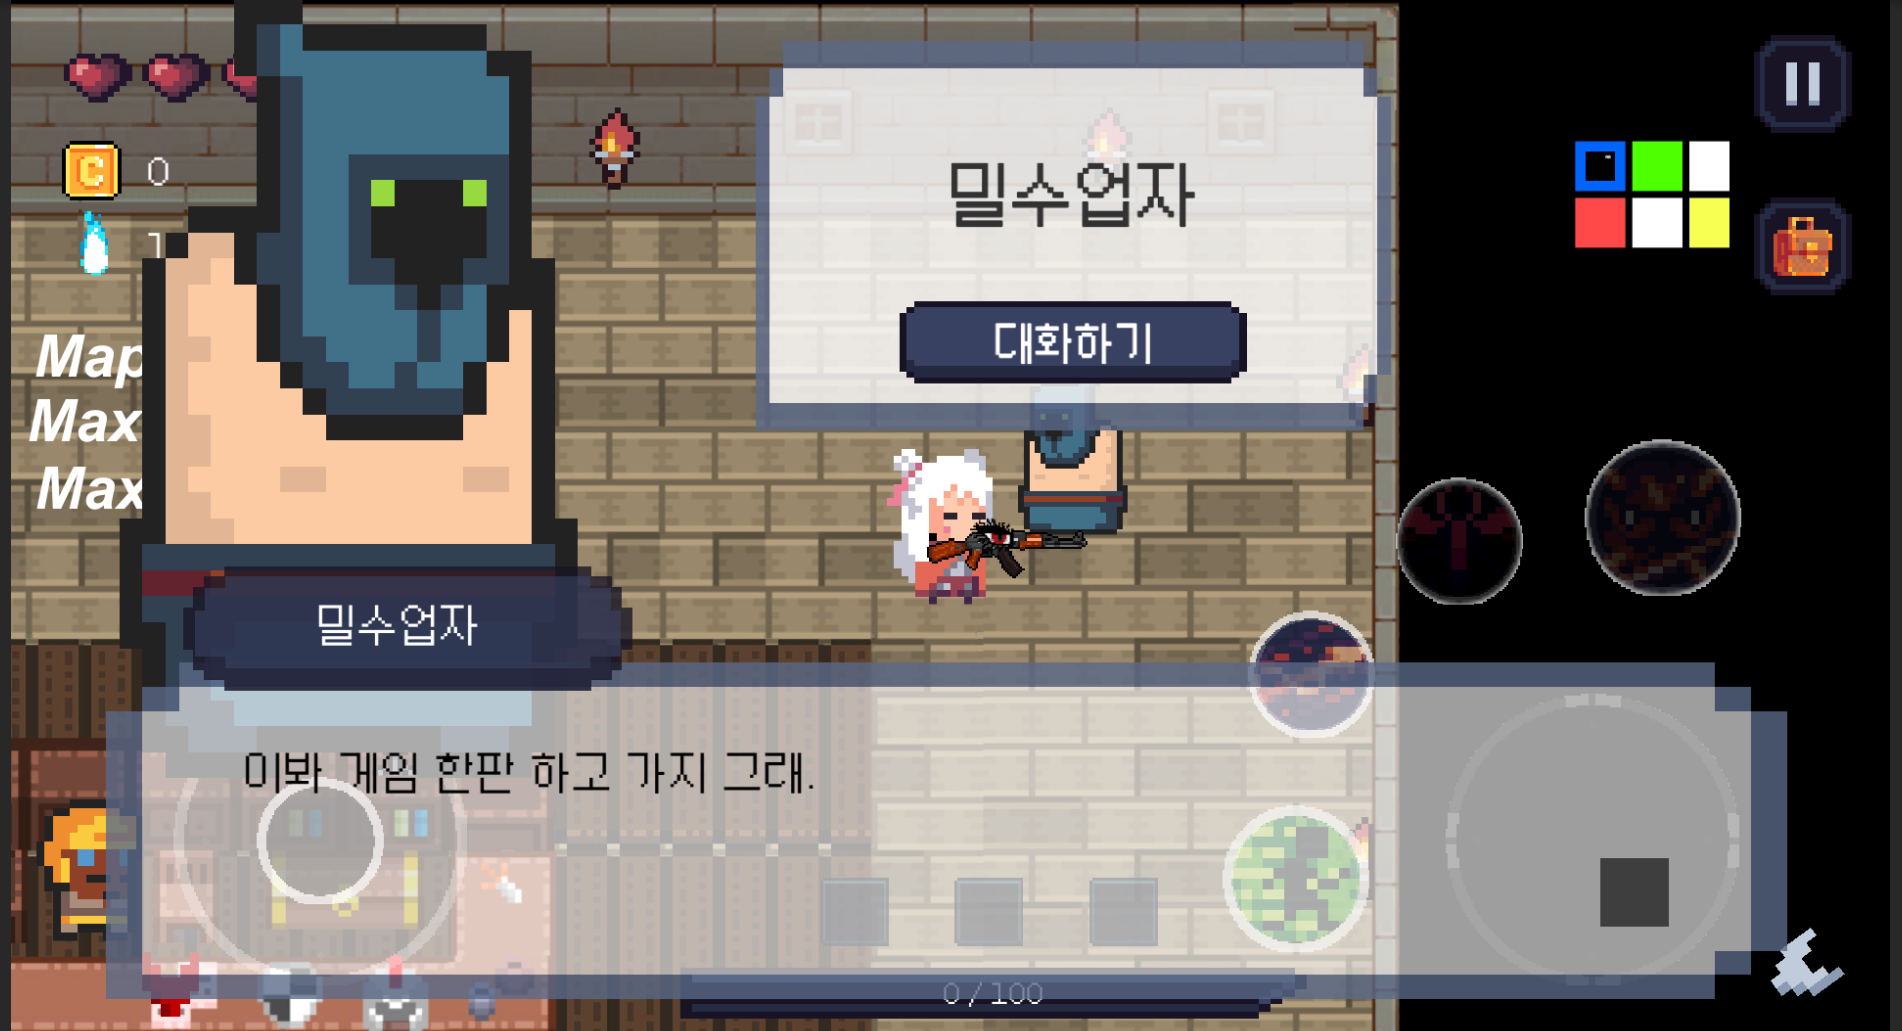
전반적인 구현은 팀원이 완료하여 이벤트 디스패쳐와 연동하여 전역적으로 대화 이벤트가 발생할시 메서드 하나로 발동 할수 있도록 구조를 잡았다.
우선 전체 스크립트는 아래와 같다 (좀 길다.)
using System;
using System.Collections;
using System.Collections.Generic;
using Unity.VisualScripting;
using UnityEngine;
using UnityEngine.UI;

public class UIDialogPanel : MonoBehaviour
{
    public enum eDialogType
    {
        NONE = -1,
        TUTORIALBASIC,
        TUTORIALSTAT,
        TUTORIALSHOP,
        TUTORIALRESULT,
        TUTORIALKNIGHTDIPOSIT,
        TUTORIALROGUEDIPOSIT,
        TUTORIALDICE,
    }

    [SerializeField]
    private Text txtNPCName;

    public Text txtDialog;
    public Button btnDim;
    public Animator anim;
    public GameObject endArrowGo;

    [SerializeField]
    private Image portrait;
    private int idx;

    [SerializeField]
    private float charPerSecond;
    private string targetDialog;

    private int diaologIdx;
    private bool isTalking;

    //임시값
    private string dialogA = "이봐 레이첼,새 무기를 받아가도록해";
    private string dialogB = "건승을 빈다 레이첼";

    private string gun;

    private List<DialogData> dialogDataList;
    private List<string> dialogList;
    private List<string> npcNameList;
    private List<string> SpriteNameList;

    public event Action OnDialogEnd;

    private string[] gunArr = { "AssultRifle", "ShotGun", "SubmachineGun", "SniperRifle" };

    public void Init(){

        this.dialogDataList = new List<DialogData>();
        this.dialogList = new List<string>();
        this.npcNameList = new List<string>();
        this.SpriteNameList = new List<string>();

        EventDispatcher.Instance.AddListener(EventDispatcher.EventName.UIDialogPanelRandomWeaponDialog,
            this.RandomWeaponDialog);
        EventDispatcher.Instance.AddListener<eDialogType>(EventDispatcher.EventName.UIDialogPanelStartDialog,
            this.StartDialog);

        this.gameObject.SetActive(false);
    }

    /// <summary>
    /// NPC다이얼로그를 타입에 따라 대화를 진행합니다.
    /// </summary>
    /// <param name="type">다이얼로그 타입</param>
    private void StartDialog(eDialogType type)
    {
        this.gameObject.SetActive(true);

        this.SetDialogList(type);
        this.SetDialog(this.dialogList[this.idx]);
        this.SetPortraitAndName(this.npcNameList[this.idx],this.SpriteNameList[this.idx]);

        this.anim.Play("UIDialogPanel_Portrait", -1, 0);

        this.btnDim.onClick.AddListener(() =>
        {
            Debug.Log(this.idx);
            if (!this.isTalking)
            {
                this.anim.Play("UIDialogPanel_Portrait", -1, 0);

                this.idx++;
                if (this.idx >= this.dialogList.Count)
                {
                    var pos = this.portrait.transform.localPosition;
                    if (type == eDialogType.TUTORIALDICE) this.portrait.transform.localPosition = new Vector3(pos.x, pos.y - 200, pos.z);
                    else this.portrait.transform.localPosition = new Vector3(pos.x, pos.y - 350, pos.z);
                    this.idx = 0;
                    this.OnDialogEnd?.Invoke();
                    this.OnDialogEnd = null;
                    this.gameObject.SetActive(false);
                }

            }
            this.SetPortraitAndName(this.npcNameList[this.idx], this.SpriteNameList[this.idx]);
            this.SetDialog(this.dialogList[this.idx]);
            Debug.Log(this.idx);
        });
    }

    private void SetDialogList(eDialogType type)
    {
        //다이얼 로그 관련 필드 초기화
        this.btnDim.onClick.RemoveAllListeners();
        this.idx = 0;
        this.isTalking = false;
        var pos = this.portrait.transform.localPosition;
        if(type == eDialogType.TUTORIALDICE) this.portrait.transform.localPosition = new Vector3(pos.x, pos.y + 200, pos.z);
        else this.portrait.transform.localPosition = new Vector3(pos.x, pos.y + 350, pos.z);

        //다이얼로그 데이터 준비
        this.dialogDataList.Clear();
        this.dialogList.Clear();
        this.npcNameList.Clear();
        this.SpriteNameList.Clear();
        //다이얼 로그 관련 리스트 할당
        this.dialogDataList = DataManager.Instance.GetDialog(type);
        this.dialogDataList.ForEach((x) => { this.dialogList.Add(x.dialogKOR); });
        this.dialogDataList.ForEach((x) => { this.SpriteNameList.Add(x.npcSpriteName); });
        this.dialogDataList.ForEach((x) => { this.npcNameList.Add(x.npcName); });
    }

    public void SetDialog(string dialog)
    {
        if (this.isTalking)
        {
            this.txtDialog.text = this.targetDialog;
            CancelInvoke();
            this.EndEffect();
        }
        else
        {
            this.targetDialog = dialog;
            this.StartEffect();
        }
    }

    private void SetPortraitAndName(string NPCName, string NPCPortraitName)
    {
        Debug.Log(NPCPortraitName == null);
        this.txtNPCName.text = NPCName;
        if (NPCPortraitName == "")
        {
            this.portrait.sprite = AtlasManager.instance.GetAtlasByName("UINPCPortraitIcon").GetSprite("nullImage");
        }
        else
        {
            this.portrait.sprite = AtlasManager.instance.GetAtlasByName("UINPCPortraitIcon").GetSprite(NPCPortraitName);
            this.portrait.transform.localScale = new Vector3(50, 50, 50);
        }
    }

    //애니메이션 제어 3단계
    private void StartEffect()
    {
        this.txtDialog.text = "";
        this.diaologIdx = 0;
        this.endArrowGo.SetActive(false);
        this.isTalking = true;

        //1글자가 나오는 속도
        Invoke("OnEffect", 1 / this.charPerSecond);
    }

    private void OnEffect()
    {
        if (this.txtDialog.text == this.targetDialog)
        {
            this.EndEffect();
            return;
        }

        this.txtDialog.text += this.targetDialog[this.diaologIdx];
        this.diaologIdx++;
        //재귀적 사용
        Invoke("OnEffect", 1 / this.charPerSecond);
    }

    private void EndEffect()
    {
        this.endArrowGo.SetActive(true);
        this.isTalking = false;
    }
}
일단 StartDialog 라는 메서드를 사용하여 전역적으로 어떤 상황에서든, 호출자가 어떤 객체이든 간에 미리 정의된 이넘을 이용하여 대화를 호출할수 있다.
대화는 한줄한줄 데이터 클래스에 정보가 담겨있는데 우선 다이얼로그 내용 자체와 NPC의 이미지 스프라이트 이름( 아틀라스 매니저와의 연동) , 그리고 대화창 좌측 상단에 표시되는 NPC의 이름이 매번 대화시 마다 업데이트 되며 리프레쉬 되게 설계하였다.
데이터테이블은 아래처럼 제작 데이터 매니저의 메서드를 만들어 타입이 들어오면 해당 타입을 string으로 형변환 하여 같은 이름의 대화 타입 클래스들을 리스트로 반환한다.
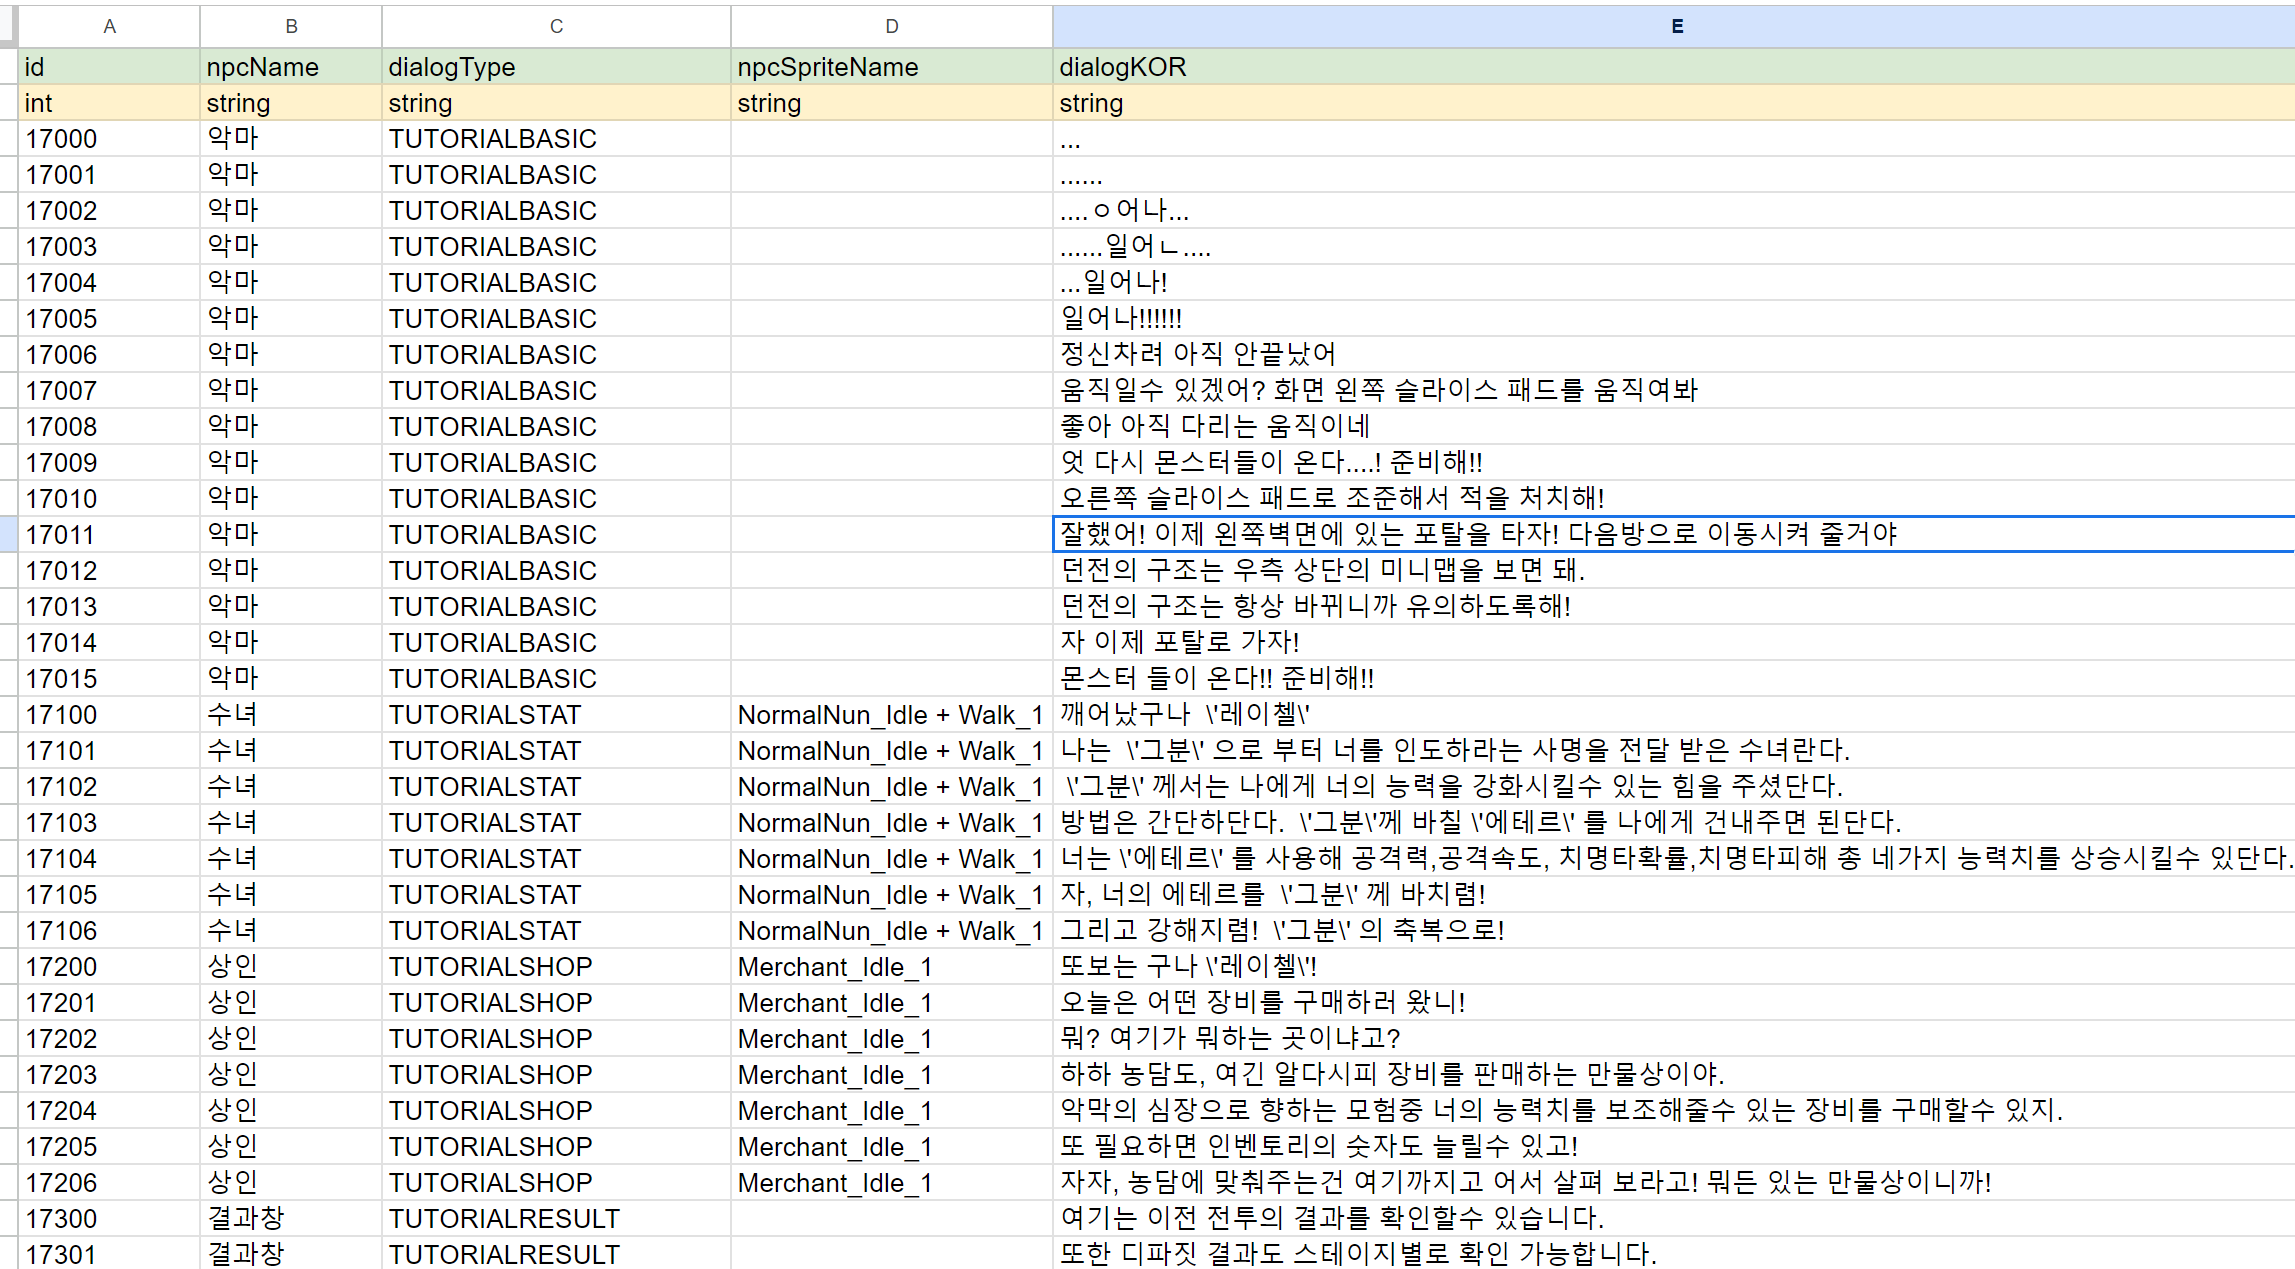
데이터 매니저 클래스는 아래와 같이 작성하였다.
using Newtonsoft.Json;
using System.Collections;
using System.Collections.Generic;
using System.Linq;
using UnityEngine;

public partial class DataManager
{
    public Dictionary<int, DialogData> dicDialogDatas;

    public void LoadDialogData()
    {
        TextAsset asset = Resources.Load<TextAsset>("Data/dialog_data");
        string json = asset.text;
        DialogData[] arr = JsonConvert.DeserializeObject<DialogData[]>(json);

        this.dicDialogDatas = arr.ToDictionary((x) => x.id);
    }

    public DialogData GetDicDialogData(int id)
    {
        return this.dicDialogDatas[id];
    }

    public List<DialogData> GetDialog(UIDialogPanel.eDialogType dialogType)
    {
        return this.dicDialogDatas.Values
       .Where(data => data.dialogType == dialogType.ToString())
       .ToList();
    }
}
이후 위에 언급한 세가지 변수를 Foreach 링큐 메서드를 사용해 다이얼로그 스크립트 UI의 필드 리스트에 할당하고 다이얼로그가 진행된다.
만약 다이얼로그가 끝났을때 발생해야 하는 이벤트가 있다면 필드에 정의된 public event Action OnDialogEnd; 액션을 널러블로 대화의 종료시 발생시키게 해놓았고 ( 널러블 이므로 이벤트가 정의된게 없다면 발생하지 않는다.) 이벤트를 디스패치한 클래스에서 미리 정의해주면 된다.
예시로 대화 이벤트를 발생시키는 스크립트는 아래와 같이 발생시킬수 있다.
this.NPCPopupDirector.onStatPopup = () =>
        {
            this.statsUpgrade.Init();
            this.targetUI = this.statsUpgrade.gameObject;
            if (!InfoManager.instance.gameInfo.isStatTuto)
            {
                this.dialogDirector.dialogPanel.OnDialogEnd += ActiveUI;
                EventDispatcher.Instance.Dispatch(EventDispatcher.EventName.UIDialogPanelStartDialog,
                    UIDialogPanel.eDialogType.TUTORIALSTAT);
                //InfoManager.instance.TutorialDone(InfoManager.eTutorialType.STAT);
            }
            else
            {
                this.ActiveUI();
            }
        };
위에서는 튜토리얼을 진행했을시에는 더이상 대화창이 뜨지 않게 했고 이는 gameInfo 클래스에 튜토리얼 완료 여부가 각각의 튜토리얼 별로 저장되게 된다.